NSX-T upgrade from 3.2.1 to 3.2.2
Today we will perform NSX-T upgrade and its operation.
- Overview
- Upgrade coordinator
- Precheck
- Upgrade edge
- Upgrade host
- Upgrade management/controller
- Post check
- Rollback
- Log review in case of any issue.
- Summary
- Overview
NSX-T upgrade process depends on the number of components you have in your infrastructure. Before proceeding the upgrade you must check the upgrade path and interop matrix with respect to your NSX-T upgrade. Check if the component in your infrastructure is compatible with the new NSX-T version or not.
https://interopmatrix.vmware.com/Interoperability
The upgrade path will show if the upgrade of NSX-T is support from your current version to the target version or not. In our case the target version is 3.2.1.1
https://interopmatrix.vmware.com/Upgrade

Check the known issue and resolved issue for this version of NSX-T in release notes.You will find these details on VMware release notes.
Once you have validated the above details and assessment of your environment then you have to download vmware mub(manager upgrade bundle) file from vmware downloads for new NSX-T version

Download the file and upload on your
- Upgrade coordinator
The upgrade coordinator runs in the NSX Manager. It is a self-contained web application that orchestrates the upgrade process of hosts, NSX Edge cluster, NSX Controller cluster, and Management plane.
The upgrade coordinator guides you through the proper upgrade sequence. You can track the upgrade process and if necessary you can pause and resume the upgrade process from the user
interface. The upgrade coordinator allows you to upgrade groups in a serial or parallel order. It also
provides the option of upgrading the upgrade units within that group in a serial or parallel order
Step 1 – Access the NSX Manager Upgrade Portal
System -> Upgrade -> Upgrade
Step 2 – Upload the bundle
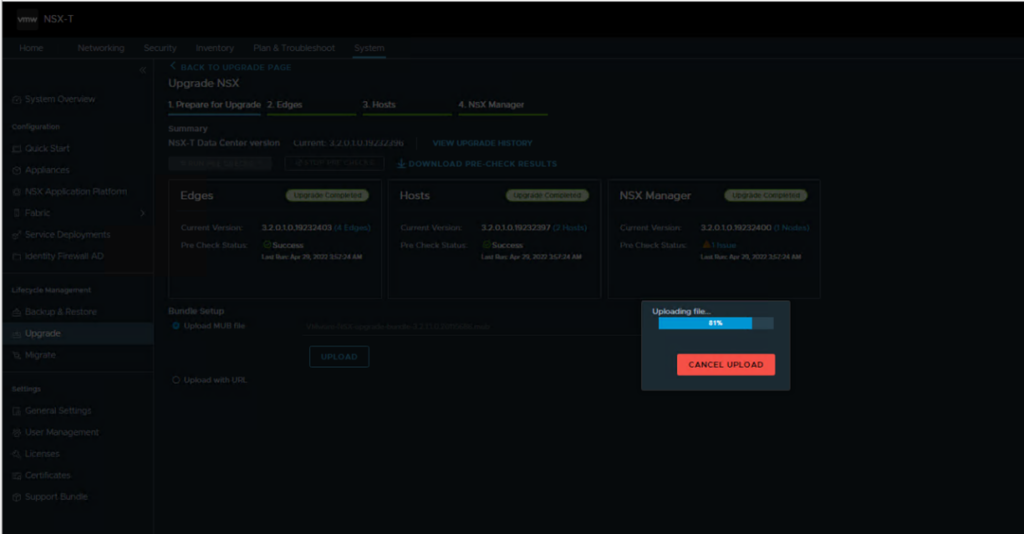
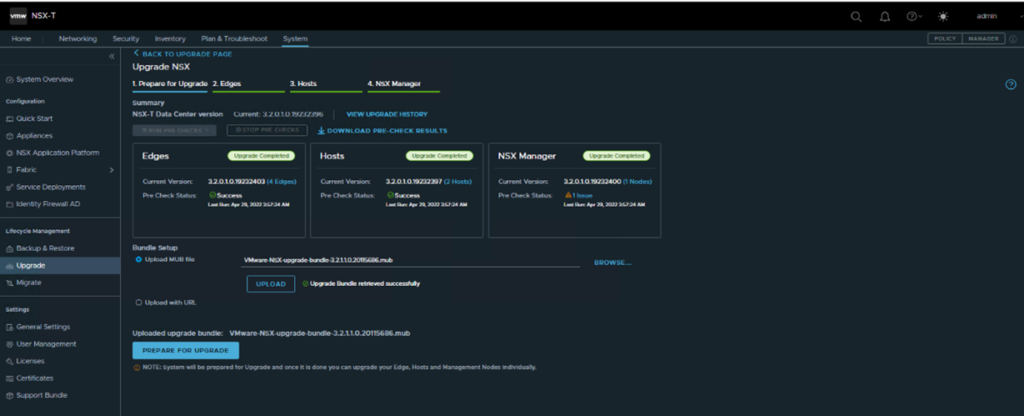
As shared first Upgrade coordinator gets upgraded and then the other component.
Let’s check the UC version before proceeding. Run below API to check the UC version.
https://<manager fqdn or ip>/api/v1/upgrade/summary

Click next to proceed with the upgrade. UC will ask for end user license. Accept and proceed.

UC upgraded started UC will upgrade and reboot

Post upgrade lets see the UC version from same API

You can see the UC is already being upgrade , however the upgrade status is not stated yet.
3.Precheck
Before proceeding for upgrade the UC ask to run pre-checks on all components. Without prechecks upgrade cannot be started.


Note: You must resolve the error on component before proceeding to upgrade. Without clearing this error, the UC won’t allow you to proceed.
Note: The upgrade must be in sequence where edge upgrade first and then hosts and manager in last. You cannot skip any component. In case you try to upgrade host skipping edge, you see the start option as greyed out.

4.Upgrade edge
After upgrade coordinated upgraded and prechecks done. The UC will proceed for the upgrade for edge cluster based on user input.
By default the Edge cluster are upgraded parallel , however within the edge cluster edges are upgrade serially.
In case you want to re change the settings or if any new edges are added in environment you have to reset the plan so that new edge is visible on UI.


On per edge cluster you get option to either reorder(change the priority for edge upgrade) or change status where you can disable the upgrade for particular edge cluster and proceed later.

Note: Even you disable the upgrade of edges or edge-cluster, you cannot upgrade hosts skipping edges. This mean disable state is just to disable the upgrade for time being and continue later on.
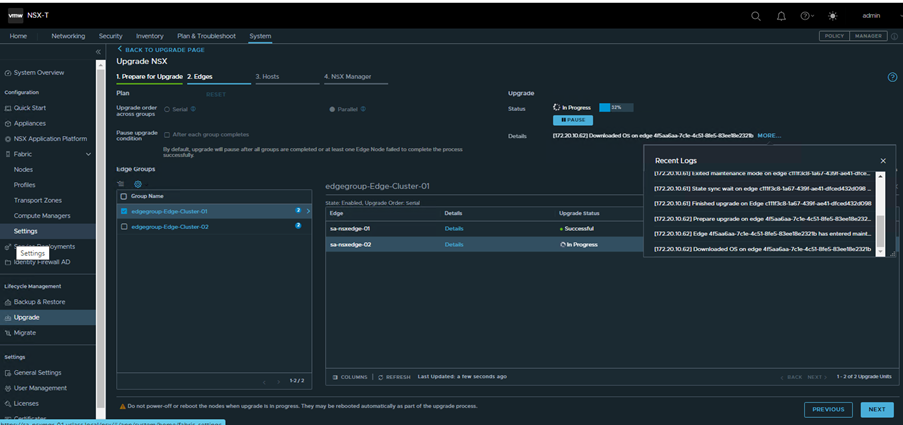
Let’s enabled edge cluster 2 as well and proceed with the upgrade.
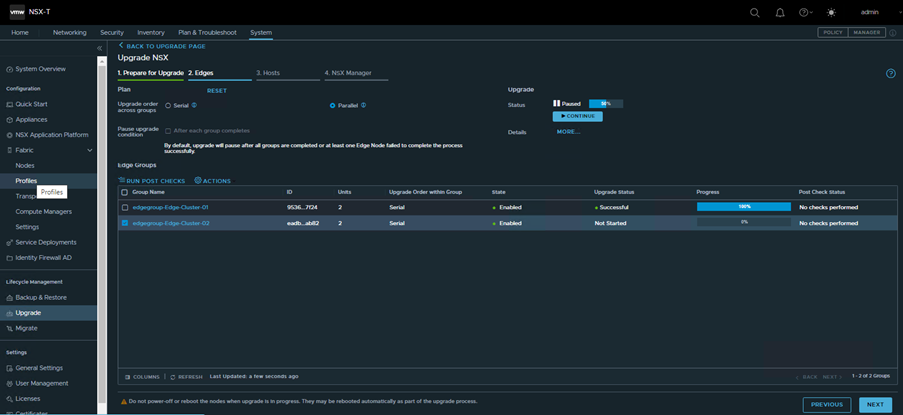
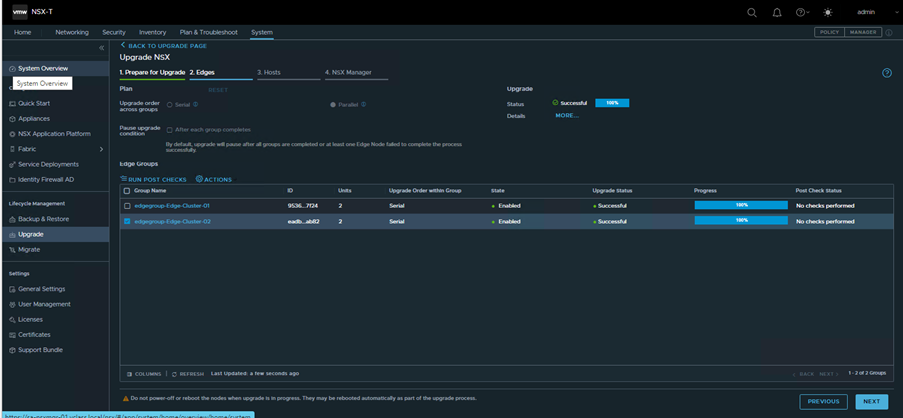
Post edge cluster upgrade you can run post checks or proceed for host upgrade and post check later.
5.Upgrade host
You can see we have group named SA-Compute-01 and inside this group we have two hosts
I will create another group and take one of the host into new group, and for new group I will perform manual upgrade


On action under host, you have option to reorder, change state to enable or disable. Change upgrade order where you decide which group should first upgrade and in last you have option to change upgrade mode to maintenance or in-place.


I will now merge group Manual_upgrade to Sa-Compute-01 and proceed with the upgrade.

In case the upgrade is failing because existing vibs has not fully removed from the host then you have to remove the vibs manually using below methods.Run this command on ESXI host and reboot it.
esxcli software vib remove -n=nsx-adf -n=nsx-context-mux -n=nsx-exporter -n=nsx-host -n=nsx-monitoring -n=nsx-netopa -n=nsx-opsagent -n=nsx-proxy -n=nsx-python-logging -n=nsx-python-utils -n=nsxcli -n=nsx-sfhc -n=nsx-platform-client -n=nsx-cfgagent -n=nsx-mpa -n=nsx-nestdb -n=nsx-python-gevent -n=nsx-python-greenlet -n=nsx-python-protobuf -n=nsx-vdpi -n=nsx-ids; esxcli software vib remove -n=nsx-esx-datapath –no-live-install; esxcli software vib remove -n=vsipfwlib -n=nsx-cpp-libs -n=nsx-proto2-libs -n=nsx-shared-libs
6.Upgrade management/Controller
The management Plane is the last upgrade which upgrade the controller as well. As the manager and controller part of same component. When management Plane upgrade is in progress, avoid any configuration changes from any of the nodes.


Check the manager upgrade progress via cli


7.Post checks
Once the migration completed run the post check for all the component and check in case of any issue.
8.Rollback
The rollback of NSX-T is only supported when you have not upgraded any of the components (Edges, host, manager) and only upgrade coordinator is upgraded. In that case the upgrade can be reset. Follow below KB for details
https://kb.vmware.com/s/article/82042
In case you already upgrade few of the component and want to rollback then you must create new manager and restore your old backup which you had taken before upgrade.
9.Log review in case of any issue.
In case you encountered any issue and want to troubleshoot then look into below logs
- /var/log/upgrade-coordinator/upgrade-coordinator.log —(this log is mostly useful prior to the step shutdown_manager, after that UC services will be in stopped state)
- /var/log/resume-upgrade.log —(this log is only useful after the step shutdown_manager on orchestrator node)
- /var/log/policy/data-migration.log —(If the upgrade step has failed in run_migration_tool then this log would be useful to identify the cause of the failure)
- /var/log/proton/data-migration.log
- /var/log/nsx-cli/nsxcli.log — (to verify the playbook task start and completion status on the orchestrator node)
- /var/log/repository/access.log —API logs
- /var/log/syslog —This content info of all errors
10.Summary.
- To upgrade the NSX-T use .mub file
- First the Upgrade coordinator will get updated on the Target NSX-T version
- Upgrade must be performed in sequence (Edge cluster, Hosts, manager)
- Skipping any of the component and directly jumping on next is not supported.For example you cannot skip edge cluster and upgrade Host first.
- Upgrade can be disabled for any group and resume later. Disabling the upgrade does not mean you can skip this and jump on next component.
- Prechecks must be performed before proceeding for upgrade, without performing precheck start button will show greyed out
- Without resolving the error on any component, you cannot proceed. For example, if error in edge during prechecks then you must resolve the error then only you can start the upgrade.
- Edge Clusters are upgraded in parallel by default. Within edge cluster edges are upgraded serially
- Hosts can be upgraded in two modes either maintenance or in-place mode.
- In maintenance mode the host will get into maintenance mode and then the upgrade will take place while in in-place mode upgrade take place without putting host in maintenance mode.
- Maintenance mode host upgrade take time to complete as it has to vacant the host by migrating all VMs and then install the NSX, but it is safer and does not need any service interruption.
- In-place mode is quick as it do not put host on maintenance mode, but it have impact on all the VMs running on the host when the NSX bits are installing.
